
Photography by Backen De
Ever been tempted to bake your own bread, croissants or pastry, then convinced yourself to leave it to the professionals? This winter, change that and give baking a go. These simple recipes are designed for both beginners and experienced bakers alike, so you can create fresh, golden treats that look and taste like they came straight from your local bakery.
BREAD
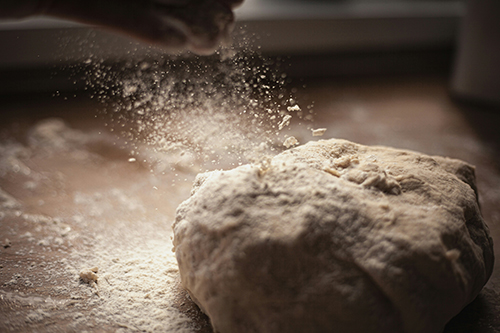
Photography by Duncan Kidd
This artisan bread recipe keeps things simple with just four ingredients, no special equipment, no kneading, and no starter required. The result? A fresh, crusty, chewy, rustic loaf that tastes incredible on its own or paired with spreads, dips, soups, or as a side to your favourite meal.
Ingredients
- 450g (3 cups + 1 tbsp) bread/ baker’s plain flour
- 350ml (just less than 1 ½ cups) warm water
- 1 ½ tsp (7g) salt (not flaked)
- ½ tsp (5g) active dried yeast
- Optional: 1 tbsp olive oil to add sheen and flavour
Method
1. In a large bowl, whisk together the flour, salt and yeast. Add water (if you are using olive oil, add it to the water here) and stir with a wooden spoon or hand until no dry flour remains. You don’t need to mix a lot, it just needs to come together. The dough will be sticky and will not look smooth.
2. Cover the bowl tightly with plastic wrap or a lid. Let it sit at room temperature for 8 to 24 hours (24 hours is ideal).
3. Preheat your oven to 220°C. Place a Dutch Oven (covered pot) inside to heat up.
4. Put the dough onto a well-floured surface. Shape it into a ball, cover with plastic and let it rest for 30 minutes.
5. Carefully take the hot pot out of the oven and place the dough inside (on baking paper if desired) and cover with the lid. Bake for 30-35 minutes. Do not lift the lid until this time has lapsed. The bread should be well risen and textured. If the bread is shiny and not starting to rise and become rough, put the lid back on for another 10 minutes before removing.
6. Remove the lid and bake for another 10-15 minutes until the crust is golden.
Serves: 6
Adapted from My Kitchen Stories
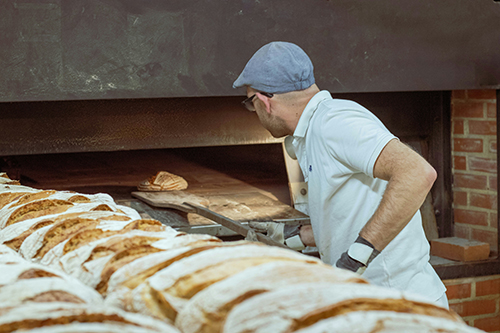
Photography by DDP-CCE
Tip
After you have made a loaf or two, why not try and experiment with different flavours and ingredients? For example, add olives, herbs, dried tomatoes or seeds at the final folding and shaping stage. Or, to make wholewheat bread, swap 1 cup (150gm) of wholewheat baker’s flour in place of 1 cup of white baker’s flour.
CROISSANTS

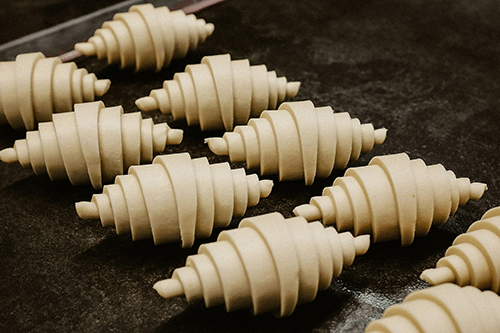
Photography by Dasha Kroti
There’s nothing else quite like biting into this classic French pastry when it’s done right – light, airy, buttery, slightly sweet, flaky on the outside and just a little bit stretchy on the inside. What makes croissant-baking a little time consuming however, is the process of folding the dough repeatedly with cold butter between each thin layer, but it’s worth the time and effort as the result is not only rewarding, but delicious. Note that this recipe is best made over two days to allow the dough to rest overnight.
Ingredients
- 500g plain flour, sifted, plus extra for dusting
- 1 tsp (7g) dry yeast
- 1 tbsp lukewarm full cream milk
- 310-330ml cold water
- 25g unsalted butter, melted
- 1 ½ tsp salt
- ¼ cup caster sugar
- 250g unsalted butter, softened
- 1 egg plus 1 egg yolk, beaten with 2½ tbsp milk
Method
1. Pour the flour in a large bowl. Make a well in the centre and add the yeast and milk, stirring to dissolve. Wait a few minutes until the yeast mixture begins to bubble. Slowly add the water and melted butter and combine the ingredients gently with your fingertips. Add the salt and sugar and keep mixing with your fingers until the dough becomes very sticky (you may need to add a little more water if the dough is not sticky enough).
2. On a lightly floured surface, knead the dough for 8-10 minutes, being careful not to add any flour during the kneading. Place the dough in a bowl, cover the top with plastic wrap and refrigerate overnight. It will double in size in the fridge.
3. Roll the dough into a rectangle that is about 5mm thick, and three times longer than it is wide. Spread half the softened butter over the centre third of the sheet. Fold the top third of the dough over the centre buttered section. Spread the remaining butter over the folded section, then fold the bottom third over the top.
4. Turn the dough 90 degrees so that the folded seams are at the sides. Roll the pastry again to form a large rectangular sheet and fold it in three. Cover in plastic wrap and refrigerate for 45 minutes. Repeat the process of folding and refrigerating another three times – a total of four times.
5. Preheat your oven to 220°C and line a baking tray with baking paper.
6. Roll the dough into a large 5mm-thick rectangle (if you find the dough hard to manage, divide it into half). Trim the edges, then cut into triangles 6-8cm wide x 12-15cm tall. Make a small triangular incision in the centre at the base of each triangle to allow the dough to stretch when being shaped. Starting from the widest end, roll the triangles up and shape into a crescent.
7. Space the croissants out on the baking tray and leave them to rise by about one-third in a draft-free, warm room (21°C is ideal) for about an hour.
8. When the croissants have risen, brush them with the egg wash and bake for 10 minutes or until golden. Do not open the oven door during cooking time. Transfer to a wire rack to cool.
Initial chilling time: overnight
Total second day chilling time: 3 hours
Second day rising time: 1 hour
Photography by Jhunelle Francis
Serves: 10-12.
Adapted from Poh’s Kitchen/SBS Food
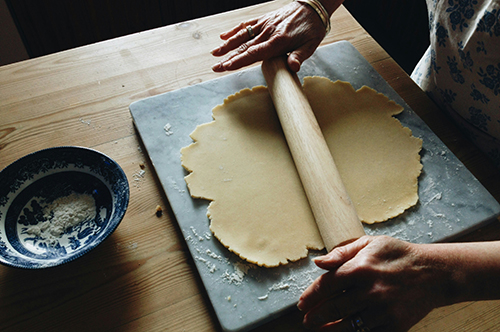
SHORTCRUST PASTRY
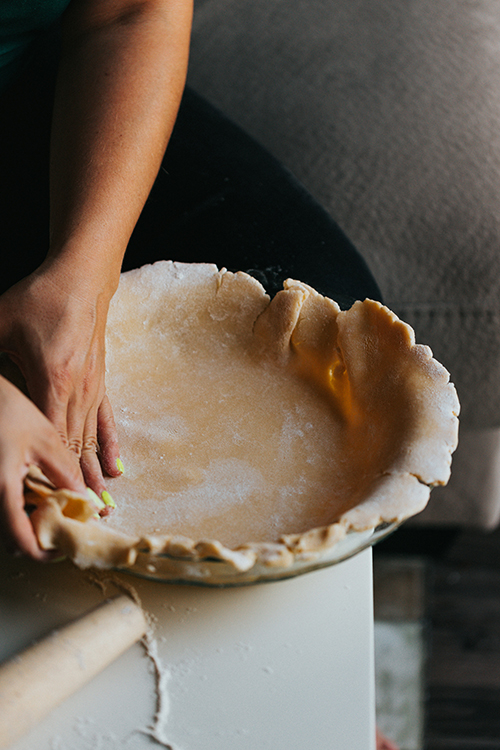
Photography by Nathan Dumlao
This classic pie crust recipe is superbly simple and so versatile that it can be used for any kind of quiche, tart or pie. It can be used as is for a savoury dish, or add two tablespoons of icing sugar if making something sweet. What’s more, the pastry can be made ahead of time and stored in the freezer until you’re ready to use it.
Ingredients
- 1 ⅔ cups (250g) plain flour
- 125g unsalted butter, chilled, finely chopped
- 1 egg, chilled
- 1 tbsp chilled water
- Salt
Method
1. Process flour, butter and a pinch of salt in a food processor until mixture resembles breadcrumbs.
2. Whisk egg and water in a bowl until combined, then with the food processor motor running, slowly add in the flour mixture. Process until the mixture begins to form large clumps, stopping the machine before the mixture forms a ball.
3. Turn the pastry out onto a surface and knead gently to bring it together. Form into a disc for a round tart or into a log shape for a rectangular tart. Wrap in plastic wrap and refrigerate overnight or for at least 2 hours.
Makes: One 23cm (base measurement) tart tin.
Photography by Amber Maxwell
Adapted from Taste.com.au
New to kneading? It’s simply the process of working dough to develop gluten, helping it trap air, so your bread rises with a light, even texture. To knead by hand, fold the dough toward you, then push it away with the heel of your hand until smooth and elastic. How do you know it’s ready? Press the dough with two fingers and if it springs back lightly, it’s good to go.
Enjoy this complimentary magazine, and continue to feel inspired to find
endless possibilities to enhance your own living.
To read the e-brochure, click here.


